Showing posts with label tutorial. Show all posts

Saturday, June 9, 2012

Tutorial: How Do I Do My Eyebrow

Heloooo ladies.. How are yaaa? Me? I'm doing great! Today I will post my tutorial on how do I do my eyebrow. Wanna know how? All you need is eyebrow brush and eyebrow pencil (I use Viva). Ready??

My eyebrow is super thin! I wish I could have "sulam alis". Save money! LOL

Then, I draw my eyebrow with eyebrow pencil boldly (like seriously bold!)

I use this brush, left one ya!

Brush slowly the bold eyebrow, make it smoother thickness.

Look at the difference! Still natural with its own boldness! Yeay or ney?

VOILAAAAA. Make my face look different!

But, everyone has their own way you know to do eyebrow. What's your way? Let me know! You may comment or tweet me @notjustbeauty. I will wait!

Thank you for reading, my readers. :*

Sunday, June 3, 2012

Tutorial: My Office Look

Hey ladies (and gentlemen)! It's been 2 weeks since my last post. My life is changed when I moved to Bali and get a new job. But don't worry, I will not quit posting on my blog! Because I love it, and I love my readers as well. By the way, today I will post another tutorial since my last two tutorials this one and this one.. This tutorial I practically use almost everyday. Yes, it is my office make up! I love doing makeup for office, because my job required me to do so, soooo.. here I am posting this tutorial. It is a simple one, not too heavy because this is for office.

As you know I  just bought (2 weeks ago) Revlon Colorstay Eyeshadow which I reviewed here. I am so ready to share my tutorial with you guys! :)

Step 1: Don't forget to use moisturizer every time you out your make up
My morning face. LOL

Step 2: Cover your scars, pimples, or black under eye with concealer

Step 3: The eye makeup!
 
I use greenish chocolate color


Step 4: Line your eye with a little bit wing!

Step 5: Mascara!

Step 6: Powder and blush on and lipstick!

VOILA, I can do this makeup in 15 minutes!
 

These are the makeup tool that I use. :)

So, how was it? Please do comment or tweet me @notjustbeauty.

Thank you for reading, my readers. :*

Monday, April 16, 2012

Tutorial: My Everyday (Dark) Makeup Look

Hey, everyone! I am so excited today because I will share my 2nd tutorial. *yeay* This is a simple one, like I promise you before, I will give makeup tutorial using Professional Cantik Manis Gel Eyeliner that I reviewed before. This makeup look is kind of smokey eyes but, it is more simple and easier! I usually use this kind of makeup to go out at night, to hang out with my friends, or other activity at night time. I found this look is very simple, and I got the inspiration from Hannah Cho, she is famous in Youtube not just because the beauty product review, but I love all her stuffs and thoughts! :)

Are you ready? Let's start from the beginning...
Above:
Beauty Cream Nature Basic Concealer (review here)
Maybelline Unstoppable Black Pencil Eyeliner
Viva Black Eyebrow Pencil
Professional Cantik Manis Black Gel Eyeliner (review here)
MAC Eye Shadow
Maybelline Volum Express Cat Eyes Mascara


Bottom:
Maybelline Clear Smooth Aqua Gel Foundation 12 Natural Foundation 
Maybelline Clear Smooth Extra Natural Powder Foundation
Revlon Powder Blush 05 Berry Rich Blush On
Sylva Serene Coral Lipstick


From left to right:
Eyelashes curler, cheek brush, small eye shadow brush, eyebrow brush, blend eyeshadow brush, gel eyeliner brush

Step 1 & 2:
I applied concealer under my eyes, and other spots that I want to cover. And I applied liquid foundation to get smoother and flawless look. Oh, before I did all that, I didn't forget to put on my face moisturizer.
(sorry for blur photo, I made a mistake!) 

Step 3:
I filled my eyebrow with black eyebrow pencil. And brush it to make it more natural.

Step 4:
I applied black pencil eyeliner in inner upper line of my eyes to get stronger look. (I always do this before I apply my eye makeup)

Step 5:
By using the same black pencil eyeliner, I marked my eyes way a little bit higher that my eyelid, because that's the spot where I will fill it with the gel eyeliner.

Step 6:
I filled my eyelid with gel eyeliner. Apply it slowly until the whole part under the mark. Don't worry about the rest of the black pencil mark.

This is my eye looks like when I open it.

Step 7:
I applied black eyeshadow on top the line that I made before. I used small eyeshadow brush.

Step 8:
I applied white glittery eyeshadow on top the black eyeshadow. I use the blend brush (the bigger one).

These are the colors that I use.

Step 9:
I lined my bottom line of my eye, from the outer corner to the middle with black pencil eyeliner. Then I smudge it.

Step 10:
I curled my top and bottom lashes, and applied mascara, thick one.

Step 11, 12, & 13:
I applied powder foundation, blush my cheek, and put on lipstick. VOILA!

THE RESULT:
 
So, what do you think about this tutorial? Ooo, this look suits for monolid eyes! :) I hope you like my tutorial. You can comment or tweet me @notjustbeauty. Or you can twitpic me with this look! I will be very excited if you are. :)

Thank you for reading, my readers. :*

Friday, April 13, 2012

Tutorial: My Everyday (Soft) Makeup Look

Hello, everyone! Today I will show you how I did my everyday makeup, the soft one. I usually use this kinda look to go to the mall, or cafe, or anywhere in the afternoon. Because, this look is suitable for day-look. I love this look because, it is just simple, bright, and perfect for simple occasion. Usually, I only need 15 minutes to create this look. Are you excited? I AM. Because this is my first tutorial. *smile*

Let's start from the beginning..

Above:
Beauty Cream Nature Basic Concealer (review here)
ZA Eyes Vibrante E3 Eye Shadow
The Make Up Store Darkest Shadow Soft Matte Black Pencil Eyeliner
Rubotan Line Liquid Black Eyeliner
Maybelline The Magnum Volum Express Waterproof Mascara
Viva Black Eyebrow Pencil
NYX Eye/Eyebrow Pencil 906 White Pencil Eyeliner (review here)

Bottom:
Maybelline Clear Smooth Aqua Gel Foundation 12 Natural Foundation
Maybelline Clear Smooth Extra Natural Powder Foundation
Revlon Powder Blush 05 Berry Rich Blush On
Sylva Serene Coral Lipstick

These are the makeup tools. Simple one!

Step 1 and Step 2:
I put on concealer under my eye, and in other spot that I want to cover. After that I apply foundation around my face and my neck, just with my finger tip. 

Step 3:
I fill my eyebrow with black eyebrow pencil. I always use black one, because I think it really suits me. Don't you think? :p

Step 4:
I apply black pencil eyeliner along my upper line of my eye. It creates deeper look of the eye. Agree?

Step 5:
I apply soft pink color from the eye-shadow pallet on my eyelid until outer corner of my eye. It sparkles!

Step 6:
Then, apply the soft gold color on top the soft pink color.

Step 7:
 Then, I highlight my brow bone with sparkle white color to get brighter look.

Step 8:
After that, I apply black liquid eyeliner. I make a little wing. :)

Step 9 & 10:
Then, I apply black pencil eyeliner in the outer corner of my eye until half length of my eye. Then I continue applying white eyeliner until the inner corner of my eye. And I also apply white eyeliner in the inner corner of my eye to get brighter look. Then, I curl my lashes, and apply mascara. :)

Step 11 & 12:
I cover the whole look with powder foundation and blush my cheek. 

Step 13:
Last, I apply my soft pink lipstick! Voila... :)

So, what do you think? I really like this look. This is casual look, not too much, but still kinda has pretty look. 
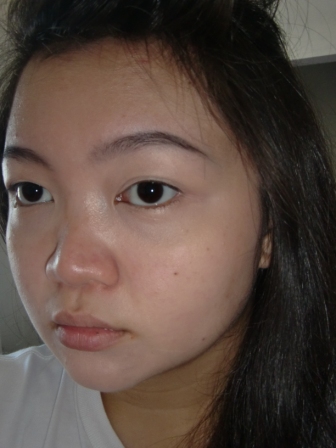
BEFORE


AFTER

Do you like it? Please do comment or tweet me @notjustbeauty

Thank you for reading, my readers. :*